A Before & After: Bathroom Reno
It is my personal opinion that before and after photos are one of the best ways to really show how much work someone put into something. During my day-to-day activities at re:fab, a commercial painting and renovations contractor in Massachusetts, the before and after’s I come across usually have to do with painting.
I work behind the scenes in the Marketing Department and marvel at the work our foremen do on a daily basis, but recently, I was able to dabble in some of the wonders of painting myself! With a lot of time and some paint, my mother and I completely re-did a bathroom in our home.
What you’ll need:
– Paint (duh)
– Drop cloths/Plastic
– Painter’s Tape
– Paint Brushes/Rollers
– Sawhorses
– Step stool/ladder
– Screwdrivers
– Paint bucket
– Good music and a nice, cold bottle of water
Step 1: Choosing the colors
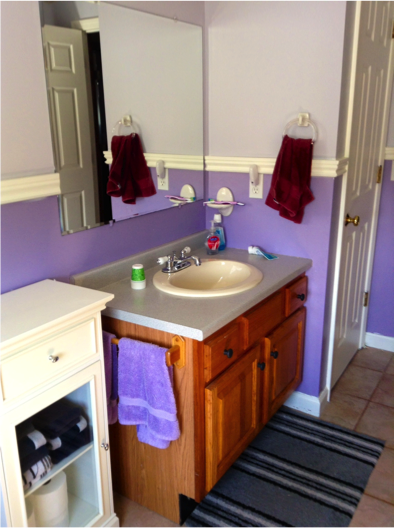
Choosing the paint shades, you want to use for your project might honestly be the toughest part of the job. When we moved into our house, the upstairs bathroom was two different shades of bright purple with a loud, flower-patterned border that went around the entire room. Let’s just say, it wouldn’t have been our first choice. *See before photos*

To choose our paint colors, we took a look at what was already in the room. Since we were only painting and were not going to replace the plumbing or flooring, we wanted to choose paint shades that flowed. The plumbing was off-white and the tile flooring was a rust/peach shade with hints of grey, so for our paint colors we chose light grey, light beige, dark grey and peach as an accent.

he dark grey is Creek Bend made by Behr Ultra, the light grey is Pensive Sky made by Glidden brand, and the light beige is Cotton Whispher by Glidden brand. *See photos*
Step 2: Painting
The walls were not the only things that were going to be painted, we wanted to paint over the wooden cabinetry as well. To make that process easier, we removed all of the drawers and doors from each and we placed them on sawhorses outside in our yard. If this is not an option for you, place the sawhorses on top of plastic drop cloths to protect your surroundings from paint splatter. As good of a painter as you THINK you may be, paint splatter is bound to happen.
We painted the walls first, starting at the top. A mid-level molding separated our walls. Make sure to use painter’s tape around the edges of your walls to not accidentally get excess paint on the ceiling, floor or molding. The easiest and quickest way to paint large spaces is definitely with a paint roller.
We used two different brands of paint for this project, both purchased at The Home Depot. Because Glidden was the cheaper choice, we decided to try it out. I would not recommend this paint. It took over three complete coats to cover the walls, in each color. The small amount of money you’d be saving wouldn’t be worth the extra coats of paint and the extra time you’d spend. The Behr brand paint was much smoother, easier to apply and took fewer coats to cover.
Step 3: Finishing Touches
When the paint was dry, it was time to decorate! This step, by far, is my favorite part. Not only do I love decorating, but also it is wonderful to see your project finally come together.
• To hide the unattractive Plexiglas shower doors, we installed a shower curtain. The gorgeous pattern added a design element to the room as well and showcased our peach accent color. Shower curtain purchased at Target.
• We switched out the light fixture above the sink to what my mom liked to refer to as a “girly” design. Light fixture purchased at Lowe’s.
• We put up a whimsical curtain in the window, incorporating that “girly” look. Curtain purchased at Ann & Hope: Kitchen and Bath Outlet.
After adding a few more small finishing touches: soft bathmats and a few colorful towels, our bathroom was complete!
It’s finally time for those after pictures. As the Marketing Assistant at re:fab, I always stress the notion that a little paint can go a long way to completely transform a space. Ladies and gentlemen, it is so, so true. *see after photos*


